Showing posts with label butterflies. Show all posts

Friday, 10 November 2017

Stampin' Unicorn Daisy Friends, Bright & Bold Easel Card

Here's another of my Stampin' Unicorn samples from the debut show on Hochanda. It's a little bit different for me but I really like the bright bold colours.


I stamped the flower from the Daisy Friends stamp set onto card three times, cut it out and then coloured the image with Prismacolor pencils. The flower was then layered up using silicone glue.


The easel card was created using the LDRS Pierced Ovals set. The dies contain a half oval which makes creating an easel card really easy. I used the gorgeous Fourni and Wonderland Papers and one of the Sentiment/Toppers from the Grab Bag.


To finish I added some ribbon and wooden embellishments from the Embellishment Pack. The wooden shapes have been coloured with Prismacolor Pencils.

I'll be back with more samples over the next few days.

Thank for stopping by today.

Claire x

Friday, 16 December 2016

Did you see Polkadoodles new product launch on Create and Craft TV?

Today saw the launch of several new products from Polkadoodles. If you caught the show you will have seen some of the samples that I made using them.

I know Polkadoodles are normally associated with CD and digital crafting but did you know that they've just launched paper pads and cutting dies? The papers are truly beautiful and the dies.... well what can I say? They cut beautifully (even shrink plastic) and a gentle tap on the table top releases the cut from the die. There's none of this poking every single little piece of paper out of intricate dies!

Anyway, I could go on and on about the new products but I won't, instead here's one of my samples that I made for the show. This was one of the cards that Nikky demonstrated.


I stamped the Belle Papillion stamps and coordinating die set onto shrink plastic and coloured the elements with Lyra pencils.


The papers have been distressed using scissors. I've then used Nikky's Stab and Stitch Pokey Tool Kit to create some faux stitching around the edges.


The sentiment has been heat embossed on vellum and I coloured all of the die cut pieces with Distress Inks before layering up onto the card.

I'll be showing more of my samples over the next few day, so please if you get five minutes pop back and take a peek.

Thanks for stopping by today.

Claire x

Materials used:
Belle Papillon Craft Kit
Papers and Stamps
Dies
Stab n Stitch Tool Kit
Wow Embossing Powder

Tuesday, 10 June 2014

Rose Budd Tissue Box Cover

So did you see the launch show yesterday for the new Rose Budd Collection from Polka Doodles? If not then you really missed a cracker (if you spot it on a re-run I'd highly recommend recording it to watch at some point). The DT samples were awesome and Nikky Hall did some absolutely brilliant demos.


I made a couple of samples for the show including this tissue box cover which you may have spotted on the counter. The CD is so packed with images, papers and lots of beautiful elements that I felt a bit over-whelmed and didn't know where to start, so when I came across the paper rose templates and butterflies I knew instantly that I had to use them! This is what I came up with.


I thought as I was pushed for time that I'd use a template from the internet, but as with all the best plans it didn't come off!! I could only find tissue box covers which were bottomless and I made one of these before and it bugged me! So I had to make my own template, which was actually a lot easier than I anticipated.


I made the plaque on the front and covered it with Crackle Glaze. Once it had dried I swiped it with Distress Ink to age it slightly.


The rolled flowers are dead easy to make up and look so effective. I held the edge between a pair of tweezers and spiraled the flower round to the centre, added a dab of glue and then lightly crushed it with the heel of my hand. I then swiped them with Distress Ink to highlight the petal edges.


I printed the beautiful butterflies out in a variety of sizes, cut them out, shaped the wings with a ball tool and then glittered them, before adding to my project.


Thanks for stopping by today.

Claire x

Materials:
Rose Budd Papercrafting CD Collection
Lace and Trims - My Stash
Glitter glue

I'd like to enter this project into the following challenges:
Laurelcraft Dragonfly Designs - Things with wings
A Girl Who Crafts - Anything Goes
Crafts & Me - Wings
Emergency Crafters - Not a card
Stempelgarten Challenge - Floral Dreams

Wednesday, 16 April 2014

Faux Bronze Egg

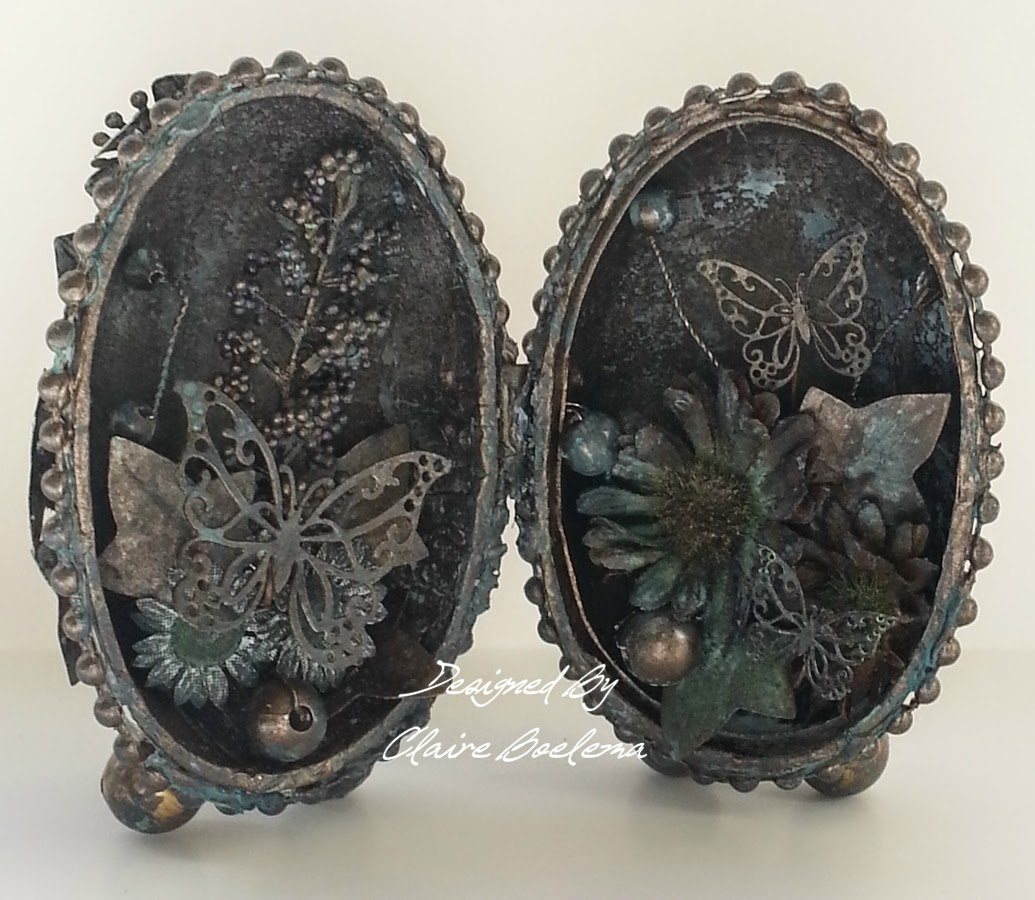
I've got another one of those little altered cardboard eggs to show you today. This was actually the first one I created after being inspired by the new Dutch Doobadoo Butterflies which I received in the post. If you haven't seen them, then you really need to take a peek - they are STUNNING (so much so I've already ordered some more!!!)


To be totally honest with you, when I first looked at the butterflies I thought they were going to be really flimsy as they are so intricate and delicate looking, but I was wrong! They are amazingly robust, so much so that they took two coats of paint and a light misting with a reactor agent.


So what did I do? Well the first thing I did was to remove the inner lip from the edge of the egg so that I could place a hinge to allow the egg to be opened and closed. Next I coated the egg with a generous coat of Gesso.


Whilst I waited for the Gesso to dry I started painting all of the objects that I intended to use on the project with Vereday Paint. Once I'd covered everything with two coats of paint I lightly spritzed it with the reactor solution and left it to work it's magic.


Once the egg and decorative pieces were completely dry I assembled the egg et voila!!


Now I know this isn't to everyone's liking but I had fun making it and I actually quite like the finished item. I'm going to give this to my MIL instead of an Easter Egg as she's diabetic and can't have ordinary chocolate and doesn't like the diabetic stuff!

These eggs are quite addictive and I have another one in the pipeline already! I just hope that I can complete it before Easter!!!

Thanks for stopping by today.

Claire x

Supplies:

Card/Paper laser Art A5 - ButterfliesMaimeri White Gesso 200ML

I'd like to enter this project into the following challenges:
Altered Eclectics - Anything Goes
Just B Creative Crazy - Anything Goes
Rhedd's Creative Spirit - Altered Art Only
Everybody Art Challenge - Anything Goes
Papertake Weekly - Easter
Pause, Dream Enjoy - Anything Goes
Through The Craftroom Door - Anything Goes
Artistic Inspirations - Anything Goes/Monochrome
Simon Says Stamp Monday Challenge - Winged Things
That Craft Place - Anything Goes/Easter

Monday, 18 July 2011

Exploding Butterflies!

Don't worry I haven't been running around torturing innocent creatures, I've just been busy making my MIL's 70th Birthday card! Wow it's been a mission! Ever start a project and wish you hadn't? Well this was one of those!!! I honestly never thought I'd say this, but by the time I'd finished I was sick of the sight of butterflies!You would not believe how many times I thought I'd got enough butterflies only to discover that I needed more! It wouldn't have been so bad if I'd been my usual slap happy untidy crafting self, but in an attempt to keep my craft mess under control I've started tidying up as I go. So you guessed it I had to dig the stamps, embossing powders, paints etc out each time! If I make one of these again, I will leave everything out and also take a little more care when cutting around the butterfly's antennae!!! I'll warn you now, this post is both butterfly and picture heavy so my apologies on both counts ;o)

Anyway, this post is gonna be long enough without me blathering on, so I'll move things along! I wanted to make a something a little special for the MIL's milestone birthday, so I decided upon an exploding box using her favourite colours. I've made exploding boxes with floating butterflies in the past but not on this scale and certainly not using hand stamped, coloured and cut images!!! All I have to do now is hope that she likes it! Anyway, here it is:


The box is made from a  9" square piece of cardstock which has been covered with embossed and sanded Core-dinations card. I've distressed the edges of the cardstock very lightly before gluing the panels into place.


The flowers have been glittered before being mounted onto the box using silicone glue. I cut the wire stems from the flowers and used them to to make the glass pearl tipped tendrils.


I stamped the butterflies using Versamark Ink and then heat embossed them with a black glitter embossing powder. Hopefully you can see from this picture that the butterflies have been painted with mica paints which gives a really pretty pearlescent luminosity to them. I've added Stickles to edges of the wings and Glossy Accents to the bodies. I've also stamped and painted the reverse side of the butterflies and coloured the edges.


The sentiment has been computer generated and cut out using my nesties. I've then inked the edges with distress ink and given it a blast of Glimmer Mist.


The numerals have been die cut from th left over scraps of Core-dinations card, lightly sanded to reveal the core colour in places and then liberally covered in Stickles to give dimension and of course that all important glitz and glimmer!

Tools
Martha Stewart Scoreboard
Sizzix Big Shot
Sizzix/Tim Holtz Vintage Market Place Die
Sizzix Swirls & Dots Embossing Folder
Spellbinders Nestabilities - Labels 8
Heat Gun

Materials
Image - EJ Crafts
Sentiment - Wishes by TLC
White card - The Papermill
Core-dinations Whitewash Card
Flowers - from stash
Glass Pearls - from stash
Stickles - Star Dust, Platinum
Glossy Accents
Glimmer Mist - Dazling Diamond
Heat It Up Black Glitter Embossing Powder
Mica Paints
Distress Ink - Dusty Concord

I'd like to enter this project into the following challenges
By The Cute & Girly - Things with wings
Crafty Ann's Challenge Blog - Embossing
The Stampman - Anything Tim
CRAFT - Butterflies
PaperPlay Challenges - Things with wings
The Rubber Cafe - Spellbinders
Crafts & Me - Summer time
My Mum's Craft Shop - Swirls & Pearls
The Paper Shelter - Things with wings
Simon Says Stamp - Anything goes
Little Claire's Designs - Things with wings

Sunday, 16 May 2010

Bookatrix Butterfly & Blooms Birthday Card

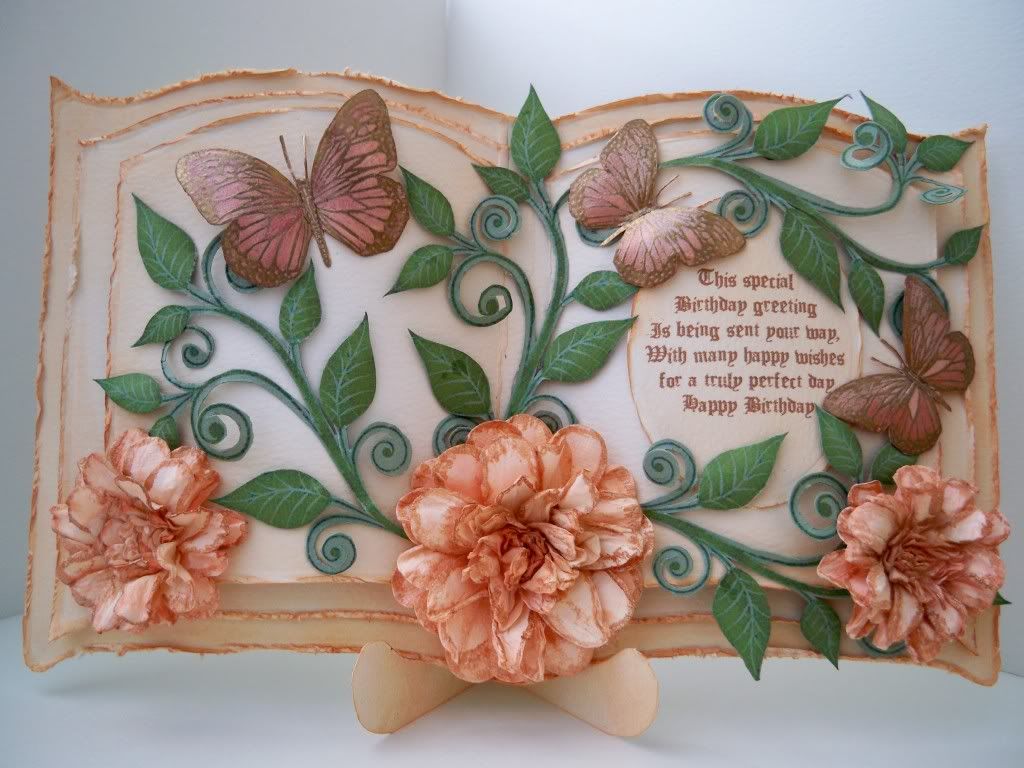
Finally my missing mojo has returned. Not sure where or why my mojo went, but it totally disappeared! I sat and stared at card blanks, stamps and pretty papers for two hours and created nothing but frustration. So I took some time out, went to visit a fellow crafter and bingo it's returned and hopefully will be here to stay (it needs to, as I have loads of cards to make this week for birthdays).

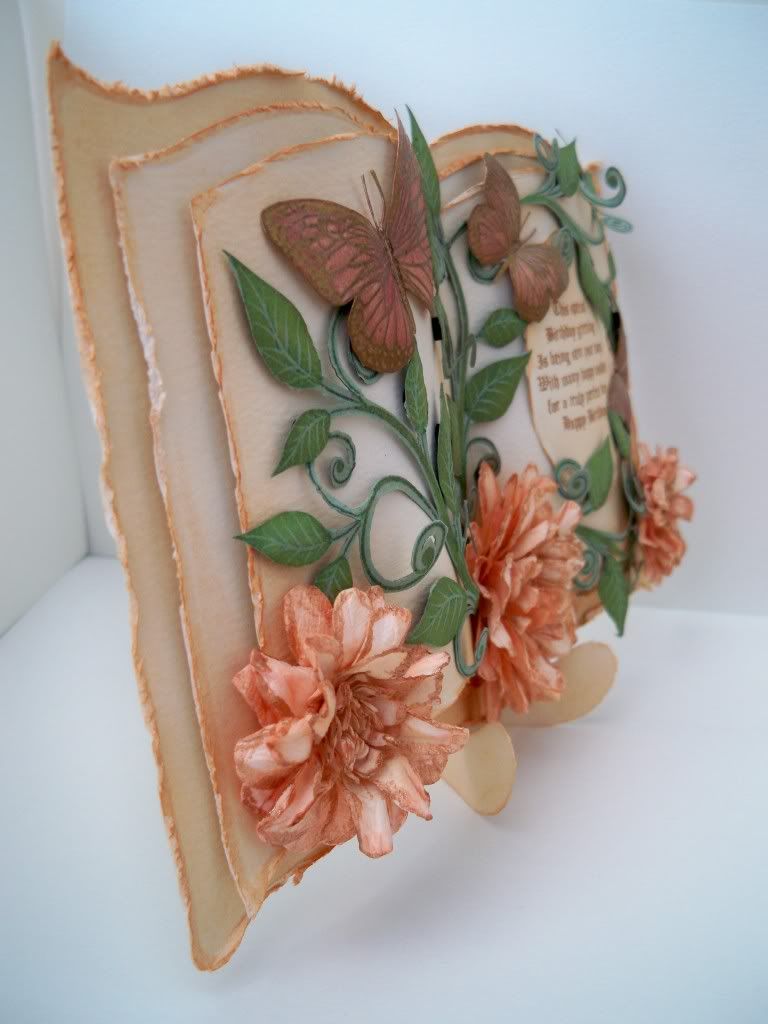
This is the card I've made for my SIL's Birthday. It took a little time as I've stamped, heat embossed and painted the butterflies with pearlescent paints. The flowers are handmade and I've also handcut the vines. Due to a lack of planning, I had to make the stand for the Bookatrix. Fingers crossed that she likes it!


Side View 

Materials
Green & Cream Cardstock - The Papermill
Tim Holtz Distressing Inks
Assorted Die-Cut Flowers  - Poundland
Brads - from stash
Perfect Pearls
Pearlescent Paints - from Oyster Stamps
Vine Leaf Digi Stamp from here
Butterfly Stamps from EJ Craft Designs
Versamark Ink
Heat It Up Gold Embossing Powder
Sentiment - computer generated
Create & Craft Micro Foam Pads

Tools
Glittergirls Bookatrix Embossing Board
Tim Holtz Distressing Tool
Tim Holtz Blender Tool
Heat Embossing Tool
Bigshot
Spellbinders Oval Nestabilities

I'd like to enter this card into the following challenges:
Sir Stampalot Challenge - Butterflys and Blooms
Dare you to digi stamp Friday - Anything goes
Cute Card Thursday - Someone Special
YNS Challenges - Cut it out & pop it up
Meljens Designs - Flowers & Blooms

Sunday, 18 April 2010

Nestabilities Easel Card

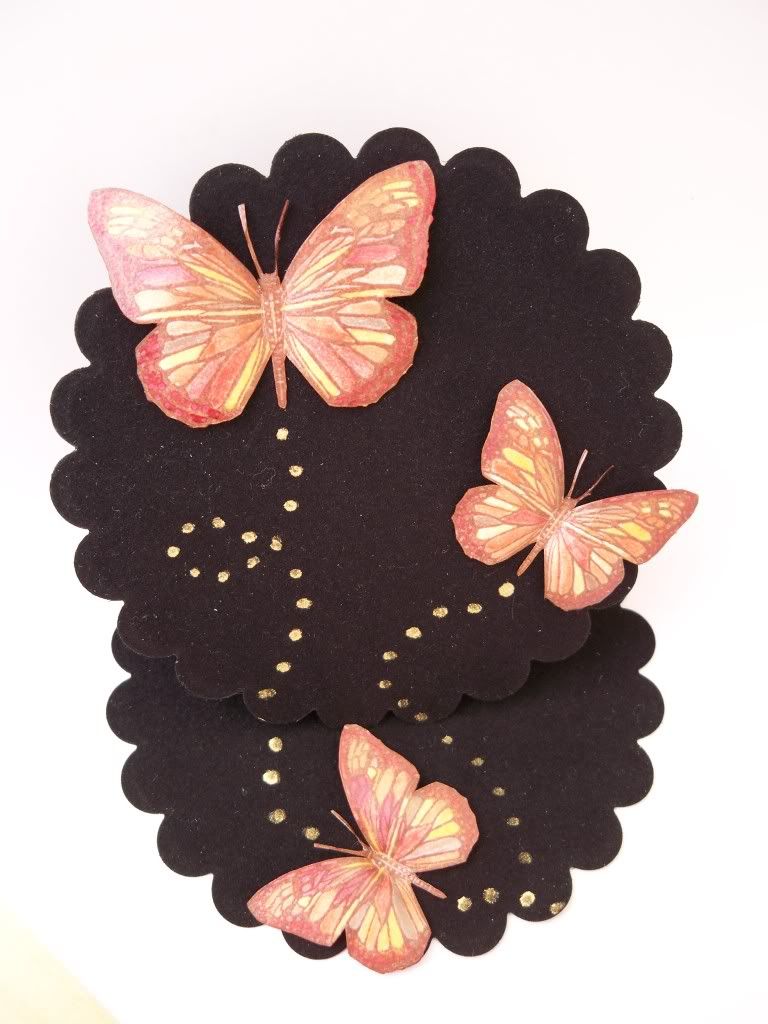
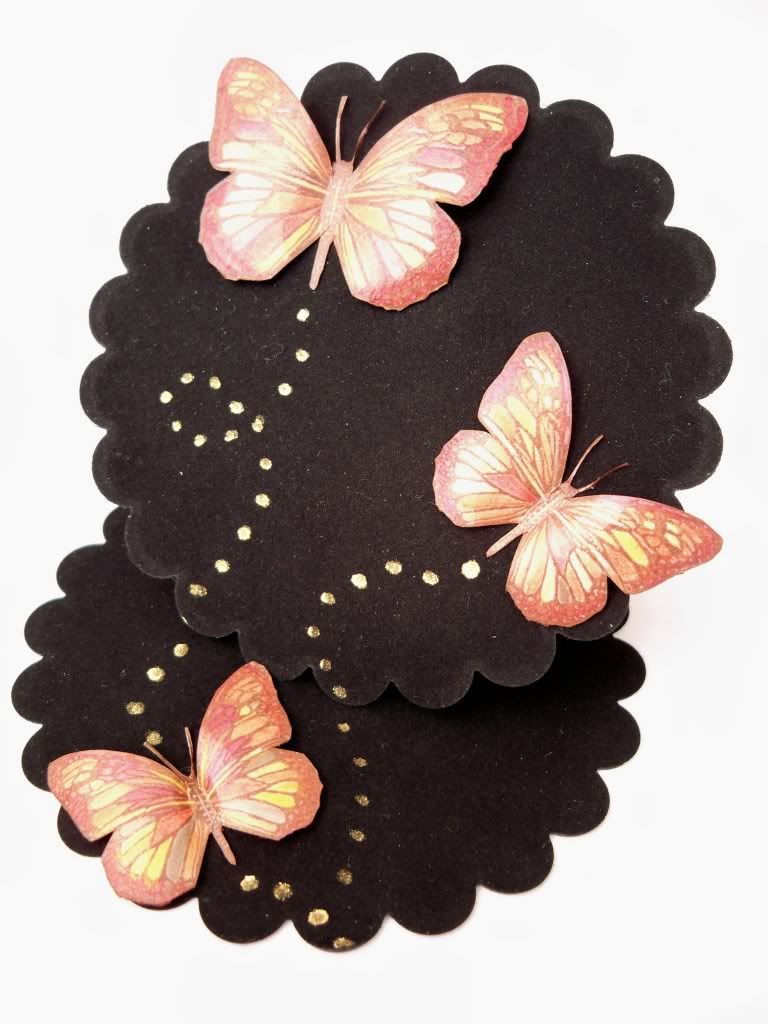
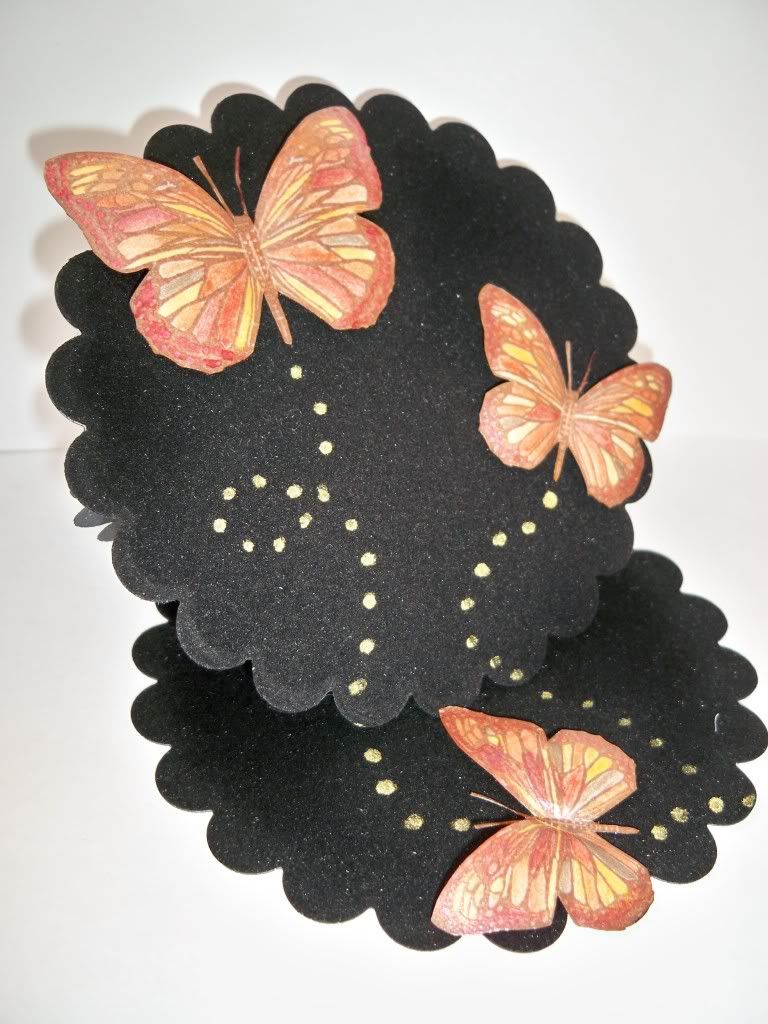
I got my new Nestabilites this week from Oyster Stamps and very impressed I am too! I also got a copy of Craft Stamper Magazine - so, put the two together and what do you get? A gorgeous shaped easel card that's what!

I've been meaning to make a shaped easel card for sometime (I spotted a tutorial on Crafty Cardmakers a while ago, but just hadn't got round to making one) so when I read an article in the magazine which used Nesties to create the cards, I just knew that I had to make one!

I'm amazed at how quick and easy the card bases were to make. The only problem is I now NEED to buy some more Nesties - LOL!

As the shape of the cardbase is so pretty I've decided to try and keep the design quite simple, I hope it's worked!

Front View


Side View


Side View


Materials:

Black Card - The Papermill

Black Velvet Adhesive Paper - Papermainia

Bigshot & Large Scalloped Circle Nestabilites

Butterflies - Stamped with Versamark, heat embossed and then painted with pearlescent watercolour paints, mounted with black foam dots

Gold swirl trails  - Shneider Gold Paintmarker

I'd like to enter this card into the following challenges:

Crafty Cardmakers 

MSE - Wings

One Stop Craft Challenge 

Cute Card Thursday

ABC Challenge

Flutterby Wednesdays

Simple Doodles

The Crazy Challenge

Stampavie & More


Meljen's Designs

Pile It On
Related Posts Plugin for WordPress, Blogger...