I've also received a few requests for a tutorial to make the paper Chrysanthemums that I used on my Tilda Tent Card. I've never done a tutorial before, so if this one needs tweaking or altering in anyway, please do feel free to contact me.
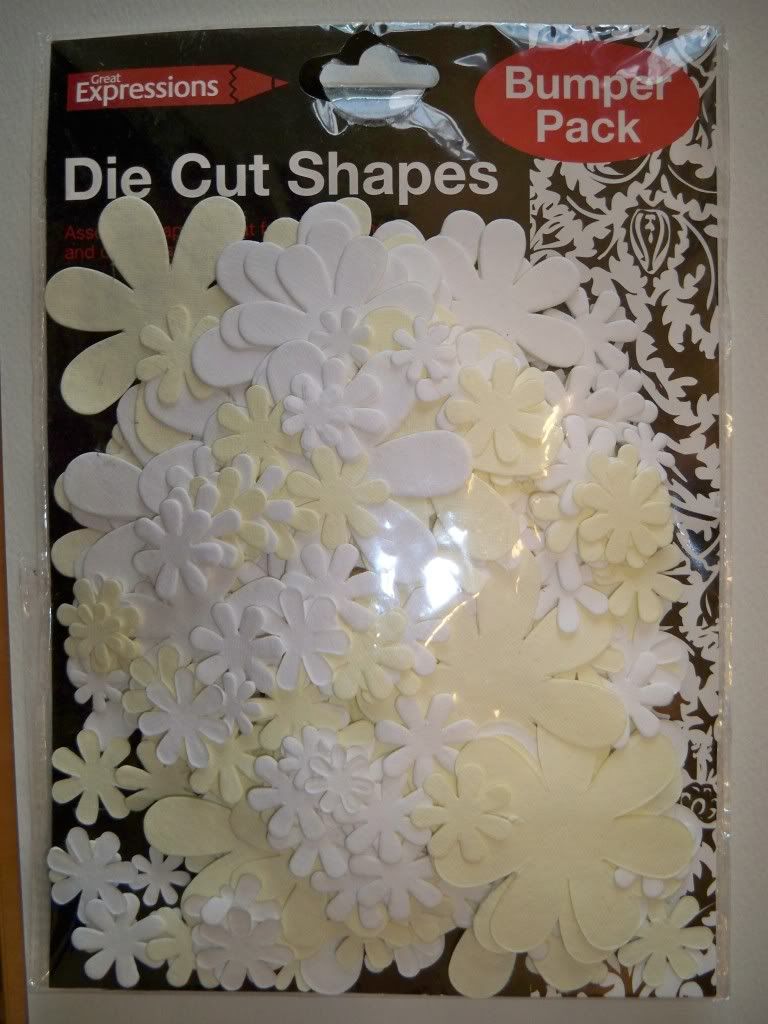
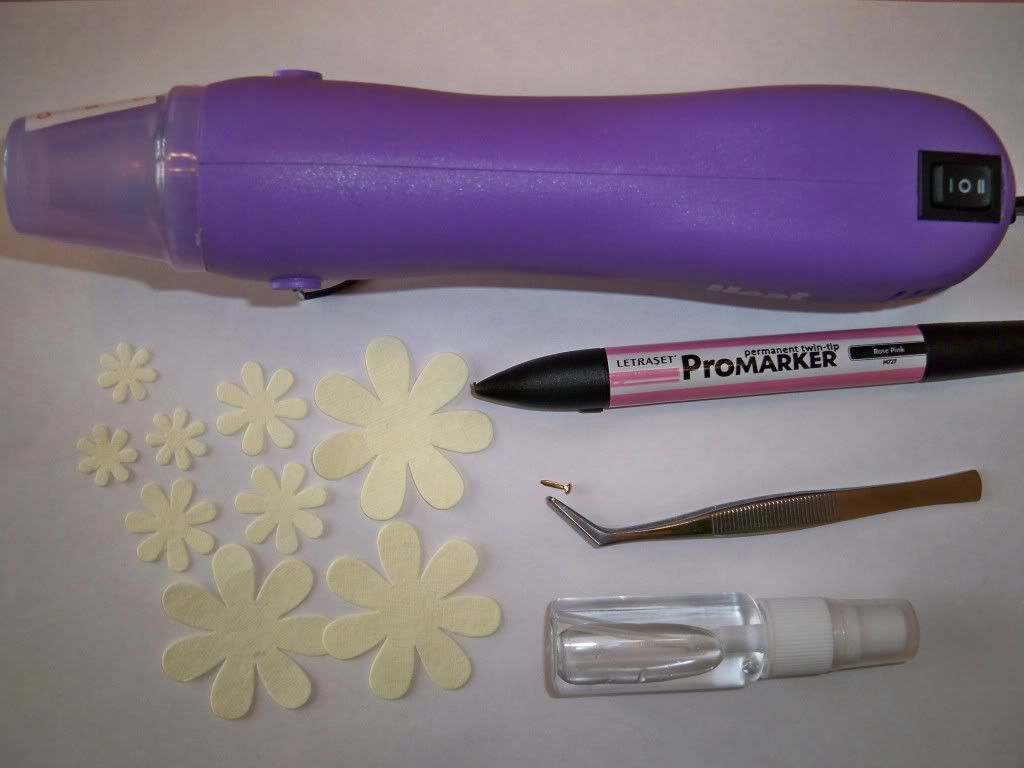
Before you start, gather your materials and tools. You will need a small brad, paper flower die cuts (I've used the ones pictured above, but you could use any punches or die cuts that you have, and pretty much any medium to heavy weight paper, a mister spray bottle filled with water, colouring materials, tweezers and a heat gun.
Decide upon the size of the flower you wish create and select your flowers accordingly. My example shows a large flower which needs 4 large flowers, 3 medium and 3 small. A smaller flower would only require 4 medium petals and 3 small petals.( I've just noticed that I've only laid out 3 large petals, but you will need 4).
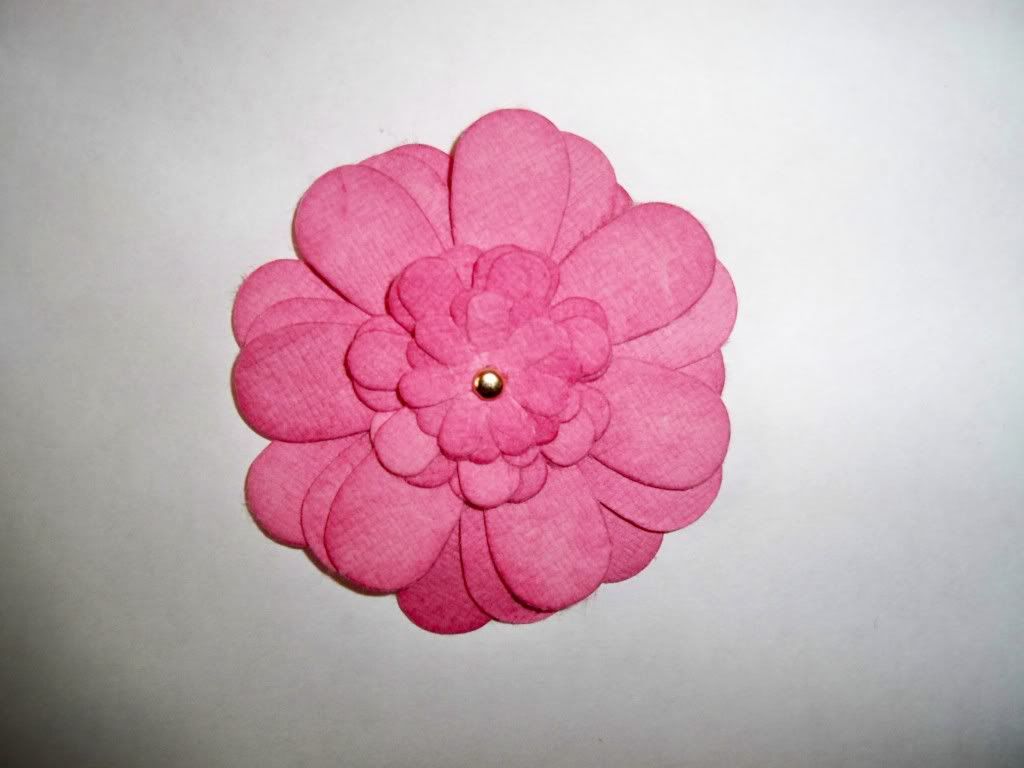
If you are going to colour the flower to co-ordinate with your project now is the time to do so. I've used Promarkers, but you can use inks or watercolours. Once the flowers have been coloured you need to secure them with the brad. They should look something like this:
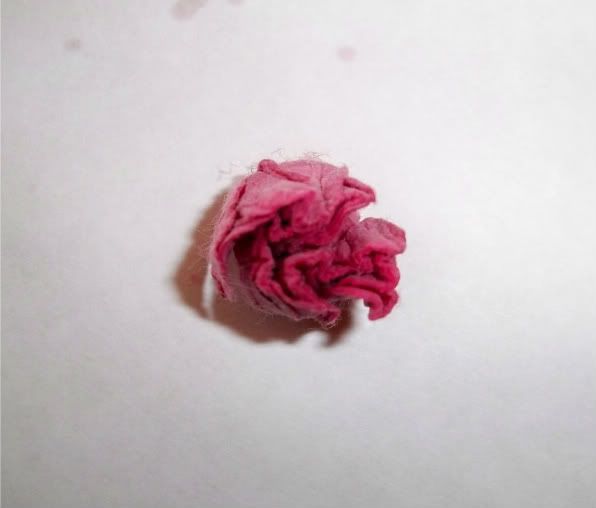
Now take the mister bottle and spray the flowers. Then simply lift each layer and scrunch and slightly twist each flower.
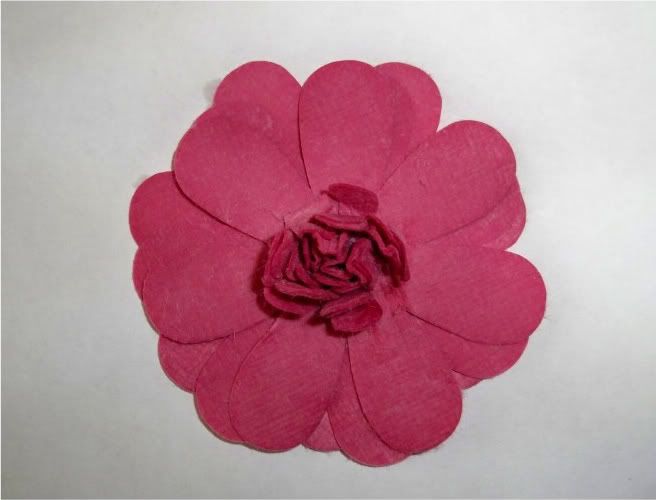
It should resemble this once you've finished.
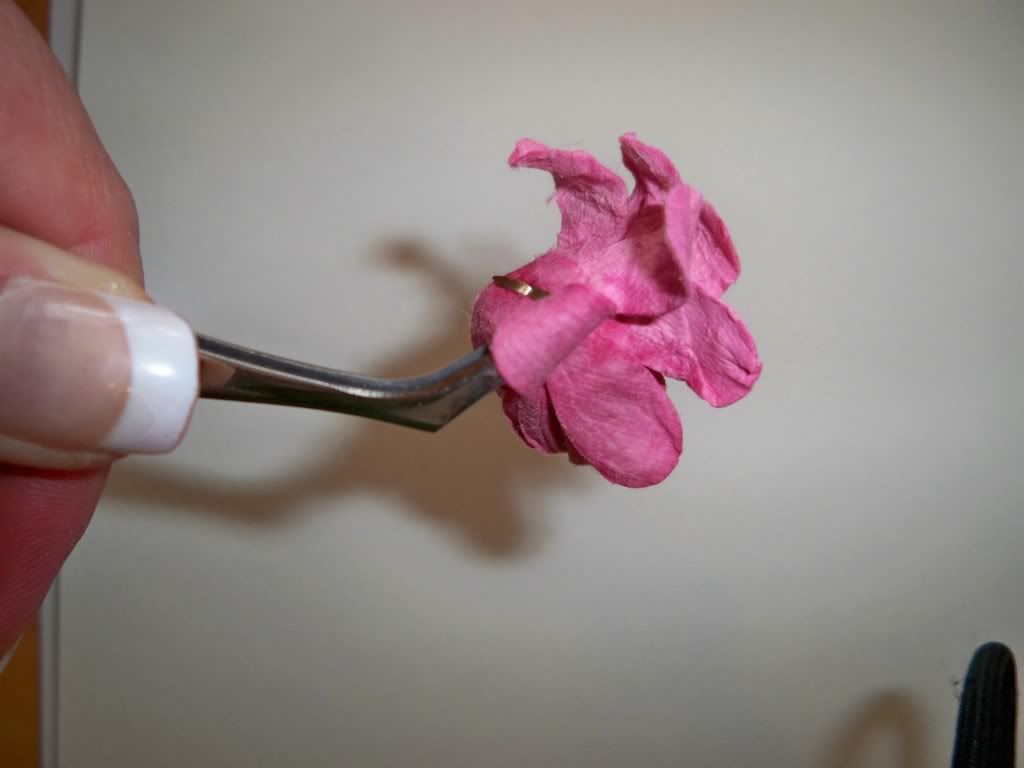
Finally, hold the flower carefully with the tweezers and give it a blast with the heat gun. Carefully curl and peel back each petal individually - if it dries into a shape or position that you don't like then simply re-wet the paper. Also, be careful not to hold the gun in one place for too long as the paper will burn.
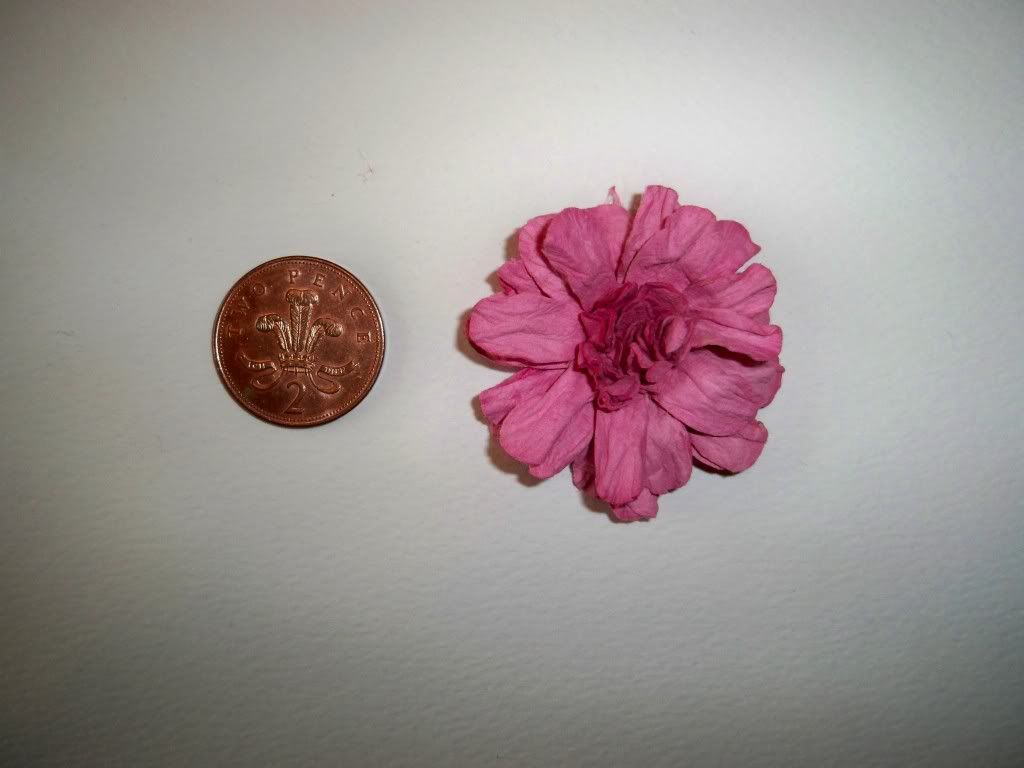
Here's the end result, one paper Chrysanthemum ready to use and decorate as you please.
Wow these are great :D Thankyou for sharing how you made them x
ReplyDeleteWow !!!! That is amazing darling you are clever I never would have guessed that your beautiful flowers started their life as that plain old pack of Poundland die cuts, your flowers look like they may have been Prima or some other very expensive bloom.
ReplyDeleteWe don't have Poundland here in Gosport but there is one in the next town and I plan to got there in 2 weeks so I will have a look for some but until then I will have a go with some punched flowers using your technique , if they turn out any good I will email you to show you
Thanks so much for sharing your wonderful tutorial with us, you would never guess it was your first go at one , your a pro darling, in fact I'm going to be doing one in a couple of weeks that ties in with one of my challenges I'll give you a shout if you like
Thanks again Have a lovely evening
Hugs Susie xx
Thanks great tutorial will have to have a go at these.
ReplyDeleteWhat a brilliant tutorial! Thank you for sharing, the finished flowers are so beautiful xxx
ReplyDeleteFantastic! Our nearest Poundland is 60 miles away, why is it whenever I go there there's never any craft stuff worth having????? And I've never seen those flowers, I'll look out for them next time I'm there.
ReplyDeleteOh! I'd missed this earlier in the week, what a brilliant idea so clearly explained - thank you x
ReplyDeleteThat is a fab tutorial... I will be hot footing to my nearest shop and following your instructions.. thank you so much.. :D Christine x
ReplyDeleteBeautiful flowers - I must try this myself. Jaqui x
ReplyDeleteVery pretty flowers.
ReplyDelete