Showing posts with label butterfly. Show all posts

Friday, 6 July 2012

Vintage Butterfly Tag

Good morning! The sun's shining, the birds are singing and I'm obviously in the land of make believe! Seriously what has happened to Summer???? My boys (DH & Son) are off camping this weekend and the forecast is just appalling, so I'm expecting lots of wet, muddy smelly clothes!! Deep joy! Just hoping (rather selfishly), that they don't make an early return as I have loads of crafting planned!

Now this is a strange post for me cos it's gonna be my last one ever for Delicious Doodles :( as I've decided to step down from the DT after almost two years. I'm really sad to be going as not only do I love working with Teri's amazing images, but the whole team are fantastic to work with too! Still, I'm hoping that I'll manage to find the time to play along with their challenges and create the odd project using her images too. Before I move onto this weeks challenge, I'd just like to say thanks to Teri for being an amazing boss lady and to the rest of the team for their friendship and on occasions help and advice - I will miss you all. x

So, enough of my rabbiting, let's move onto this weeks challenge over at Delicious Doodles which is SUMMER. Now, I've had to trawl the memory banks for this one, but seem to have a vague recollection that there should be loads of butterflies fluttering around in my garden at this time of year, so you guessed it I've used the gorgeous Butterfly image to create my first ever tag.


I used all scraps to make this tag, so it's definitely going on my list of must do's in the future. I started off by hand cutting the tag and covering it with a scrap of paper from the Studio 12 All Sewn Up Kit. The tag was then over stamped with Versafine Vintage Sepia Ink using a Script Stamp from Kaisercraft. Next, I distressed the edges and lightly crumpled the tag before inking with Walnut Stain and Victorian Velvet Distress Ink and adding some faux stitching. The Butterfly image has been printed out in two different sizes and coloured with Flexmarkers. The wings have been glittered using Stickles Star Dust and I've added Glossy Accents to the body to give dimension before mounting onto the tag using silicone glue. The fern leaves have been cut using a Little Claire's Die and the flowers were in my stash, but I've crumpled them up, added some DI and then popped a button on to finish.

I hope you all have lovely weekend - will be keeping my fingers crossed for those of you in the UK that the weather forecasters have got it wrong and that we will have glorious sunshine!!!

Thanks for stopping by.

Claire xxx

I'd like to enter this tag into the following challenges:
Whimsy Inspiration - Anything Goes
Creatalicious Chalenges - Anything goes
The Pretty Little Ribbon Shop - Tags
Papertake Weekly - Anything goes
Stamp N Plus - Anything goes
The Crafty Bloggers Network - Anything goes
Make it Monday - Anything goes
Happy Daze - Summer Holidays (inks)

Monday, 18 July 2011

Exploding Butterflies!

Don't worry I haven't been running around torturing innocent creatures, I've just been busy making my MIL's 70th Birthday card! Wow it's been a mission! Ever start a project and wish you hadn't? Well this was one of those!!! I honestly never thought I'd say this, but by the time I'd finished I was sick of the sight of butterflies!You would not believe how many times I thought I'd got enough butterflies only to discover that I needed more! It wouldn't have been so bad if I'd been my usual slap happy untidy crafting self, but in an attempt to keep my craft mess under control I've started tidying up as I go. So you guessed it I had to dig the stamps, embossing powders, paints etc out each time! If I make one of these again, I will leave everything out and also take a little more care when cutting around the butterfly's antennae!!! I'll warn you now, this post is both butterfly and picture heavy so my apologies on both counts ;o)

Anyway, this post is gonna be long enough without me blathering on, so I'll move things along! I wanted to make a something a little special for the MIL's milestone birthday, so I decided upon an exploding box using her favourite colours. I've made exploding boxes with floating butterflies in the past but not on this scale and certainly not using hand stamped, coloured and cut images!!! All I have to do now is hope that she likes it! Anyway, here it is:


The box is made from a  9" square piece of cardstock which has been covered with embossed and sanded Core-dinations card. I've distressed the edges of the cardstock very lightly before gluing the panels into place.


The flowers have been glittered before being mounted onto the box using silicone glue. I cut the wire stems from the flowers and used them to to make the glass pearl tipped tendrils.


I stamped the butterflies using Versamark Ink and then heat embossed them with a black glitter embossing powder. Hopefully you can see from this picture that the butterflies have been painted with mica paints which gives a really pretty pearlescent luminosity to them. I've added Stickles to edges of the wings and Glossy Accents to the bodies. I've also stamped and painted the reverse side of the butterflies and coloured the edges.


The sentiment has been computer generated and cut out using my nesties. I've then inked the edges with distress ink and given it a blast of Glimmer Mist.


The numerals have been die cut from th left over scraps of Core-dinations card, lightly sanded to reveal the core colour in places and then liberally covered in Stickles to give dimension and of course that all important glitz and glimmer!

Tools
Martha Stewart Scoreboard
Sizzix Big Shot
Sizzix/Tim Holtz Vintage Market Place Die
Sizzix Swirls & Dots Embossing Folder
Spellbinders Nestabilities - Labels 8
Heat Gun

Materials
Image - EJ Crafts
Sentiment - Wishes by TLC
White card - The Papermill
Core-dinations Whitewash Card
Flowers - from stash
Glass Pearls - from stash
Stickles - Star Dust, Platinum
Glossy Accents
Glimmer Mist - Dazling Diamond
Heat It Up Black Glitter Embossing Powder
Mica Paints
Distress Ink - Dusty Concord

I'd like to enter this project into the following challenges
By The Cute & Girly - Things with wings
Crafty Ann's Challenge Blog - Embossing
The Stampman - Anything Tim
CRAFT - Butterflies
PaperPlay Challenges - Things with wings
The Rubber Cafe - Spellbinders
Crafts & Me - Summer time
My Mum's Craft Shop - Swirls & Pearls
The Paper Shelter - Things with wings
Simon Says Stamp - Anything goes
Little Claire's Designs - Things with wings

Sunday, 18 April 2010

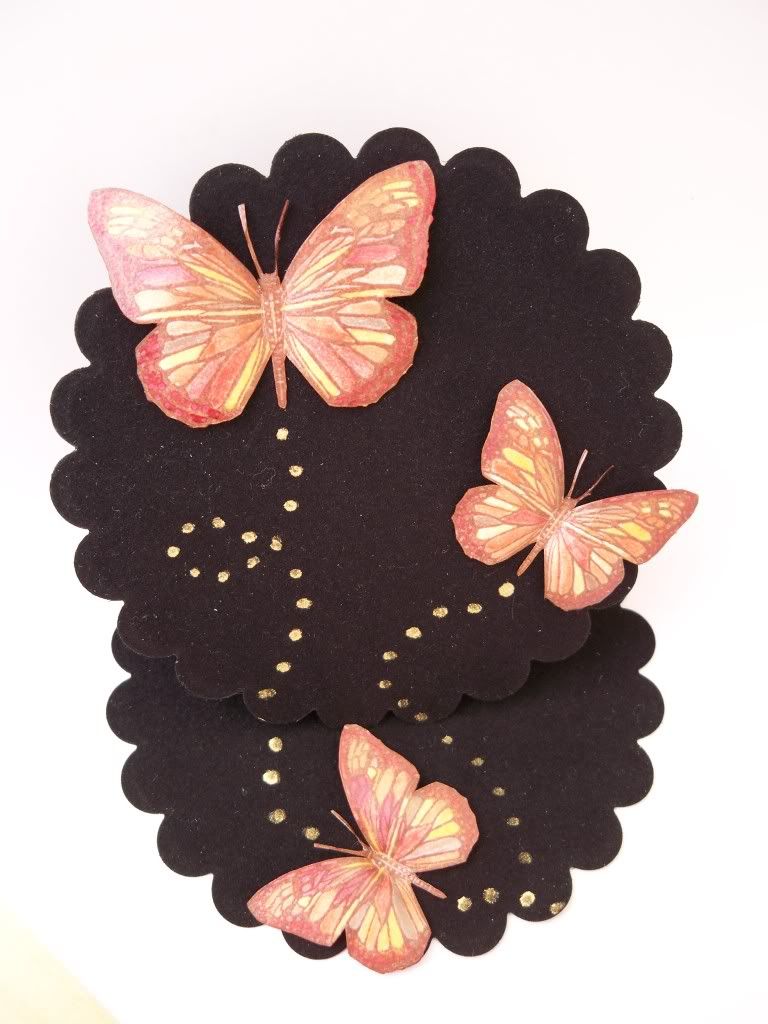
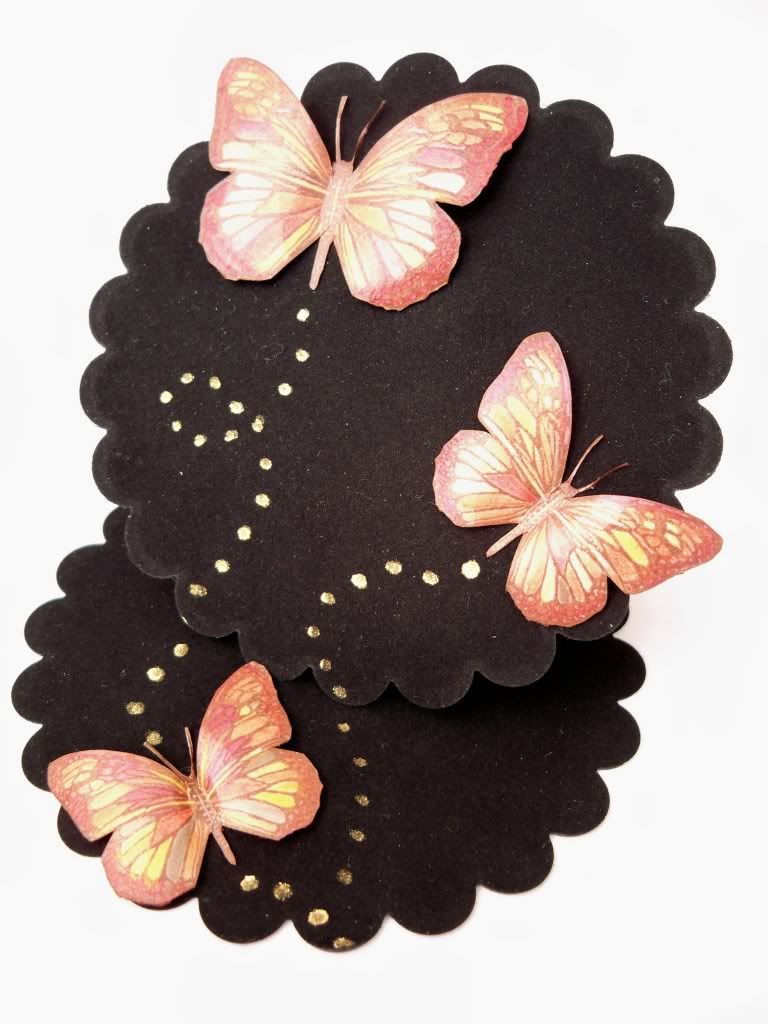
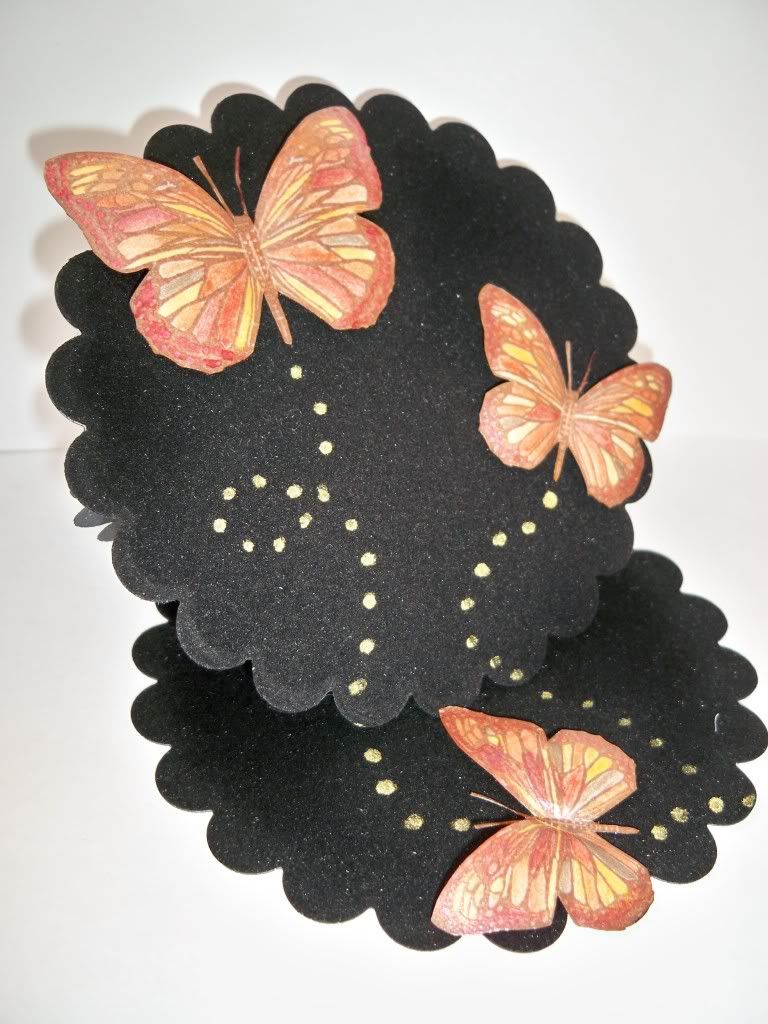
Nestabilities Easel Card

I got my new Nestabilites this week from Oyster Stamps and very impressed I am too! I also got a copy of Craft Stamper Magazine - so, put the two together and what do you get? A gorgeous shaped easel card that's what!

I've been meaning to make a shaped easel card for sometime (I spotted a tutorial on Crafty Cardmakers a while ago, but just hadn't got round to making one) so when I read an article in the magazine which used Nesties to create the cards, I just knew that I had to make one!

I'm amazed at how quick and easy the card bases were to make. The only problem is I now NEED to buy some more Nesties - LOL!

As the shape of the cardbase is so pretty I've decided to try and keep the design quite simple, I hope it's worked!

Front View


Side View


Side View


Materials:

Black Card - The Papermill

Black Velvet Adhesive Paper - Papermainia

Bigshot & Large Scalloped Circle Nestabilites

Butterflies - Stamped with Versamark, heat embossed and then painted with pearlescent watercolour paints, mounted with black foam dots

Gold swirl trails  - Shneider Gold Paintmarker

I'd like to enter this card into the following challenges:

Crafty Cardmakers 

MSE - Wings

One Stop Craft Challenge 

Cute Card Thursday

ABC Challenge

Flutterby Wednesdays

Simple Doodles

The Crazy Challenge

Stampavie & More


Meljen's Designs

Pile It On
Related Posts Plugin for WordPress, Blogger...